Boy or Girl? Cookie or Pizza?

I am happy to announce that I am going to be an Aunt! My sister is pregnant and this will be the first baby in our immediate family. Very exciting!!
To reveal the baby’s gender my sister, Carrie and her husband, Ryan, decided to have a gender reveal party. So after a little snacking we all anxiously stood around, cupcake in hand, and broke into the fate of our family.

My sister baked the cupcakes with a colored gumball inside. Depending on what the gender was, the gumball represented that color.
So… boy or girl?
Girl!!!
I am so excited to start buying frilly, girly, dressy clothes! My niece is going to be so spoiled and loved.
And after we experienced the baby excitement there was still another surprise. Why on earth would there be a pizza for dessert???
Surprise, it was a cookie pizza. Okay, so maybe it wasn’t really a surprise but I bet I had some people wondering.
The recipe is really easy to make and turns out looking really cute. And the pizza box is just a nice added touch. I was able to get mine at the local pizza place for free.
This recipe came from the Neely’s recipe on the Food Network’s “Down Home With the Neelys”.
Preheat oven to 375°
You will need:
•2 (16 1/2-ounce) packages chocolate chip cookie dough (recommended: Nestle Tollhouse)
•1/2 cup heavy whipping cream
•4 ounces chopped semisweet chocolate
•1/2 cup toffee chips
•1/4 cup chopped pecans
1.) Begin by spraying a 12 inch pizza pan with nonstick spray. If you don’t have a pizza pan it is ok! I didn’t either and here it what I did: Begin with a piece of foil that is fairly large. Draw a circle on the foil that will be the shape of the pizza. DO NOT cut the circle, just use this as a stencil for the cookie dough. You want to keep some edges of the foil in case the dough spreads. Spray the foil. And if you are using a regular pizza pan I suggest putting foil under it in case is spreads.
2.) Spread both containers of cookie dough on either the pan or foil and bake for 25 minutes. When pizza is finished, remove from oven and allow to cool.
3.) While the pizza is cooking, prepare the toppings. Begin by bringing the heavy cream to a gentle simmer. When it has heated, remove from heat and pour over chocolate. Begin stirring chocolate and cream until all of the chocolate has melted. Allow to cool and thicken.
4.) Top pizza with chocolate, then toffee and pecans.
5.) Slice, serve, and enjoy!
 

I hope you enjoy this recipe and the exciting news. Now I’ve got to start some online baby shopping so I’ll talk to you all soon!

Mouthwatering Carrot Cake

Birthdays are really important to me and my family.  In our opinion, when it is your birthday, you get all of your favorite things, including food of course.  That means a special birthday dinner and whatever kind of cake you choose.
So when my friend Nichole’s’ birthday was coming up I knew I had to make her favorite cake. Carrot cake.  I will admit that I was a little nervous.  I had never made carrot cake before so it was a little intimidating, but with a little help from my good friend Martha Stewart, I was able to make an amazing carrot cake.  I did tweak the recipe slightly but it did derive from her recipe.
You will need:
For cake:
•2 1/2 cups all-purpose flour, plus more for pans
•1 teaspoon baking powder
•1 teaspoon baking soda
•1 teaspoon ground cinnamon
•3/4 teaspoon coarse salt
•3/4 teaspoon pumpkin pie spice
•3 sticks (12 ounces) unsalted butter, room temperature, plus more for pans
•1 cup packed light-brown sugar
•1/2 cup granulated sugar
•3 large eggs
•2 teaspoons pure vanilla extract
•1/2 cup water
•1 pound carrots (8 to 10 medium carrots), peeled and shredded on a box grater or in a food processor (about 2 3/4 cups)
•1 cups pecans (1/2 cup finely chopped for batter, 1/2 cup coarsely chopped for decorating sides of cake)028
1. Preheat oven 350.  Spray 3 pans with cooking spray and flour or use Baking Joy spray.  I actually used one pan and just filled it with batter as I went.  Combine flour, baking powder, baking soda, cinnamon, salt, and pumpkin pie spice.
2. Beat butter and sugars with mixer until light and fluffy.  Add eggs one at a time, making sure that each egg is incorporated before mixing in the next.  Beat for 3 minutes.  Add vanilla, water and carrots and make sure it is well combined, mixing for about 2 minutes.  Make sure the speed is on low and mix in flour mixture  and half of pecans.
3. Divide batter into 3 parts and bake one at a time or all at once, depending on how big your oven is and what you prefer.  Bake for 30 minutes, remove and let cool for 15 minutes.  Once cooled,  run a knife around the edges and remove carefully.  Make sure cake has completely cooled before you begin icing.038
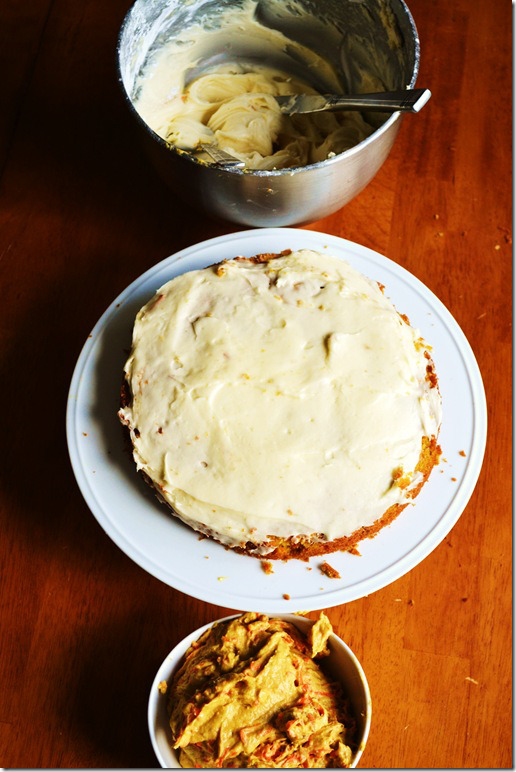
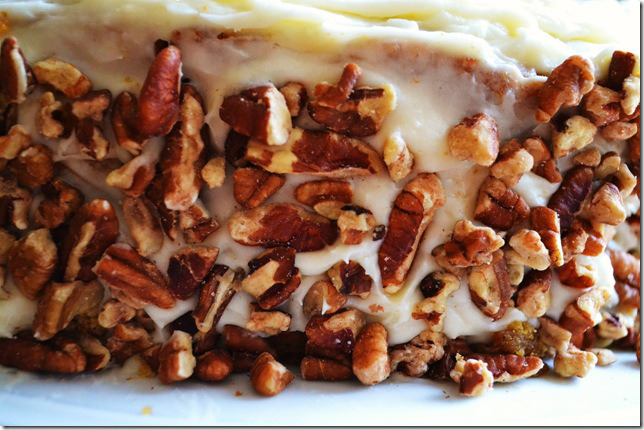
4. Place one cake on a plate.  Top with icing, followed by the second piece, more icing and the last piece.  Ice entire cake and then press pecan pieces on the outside of the cake.137
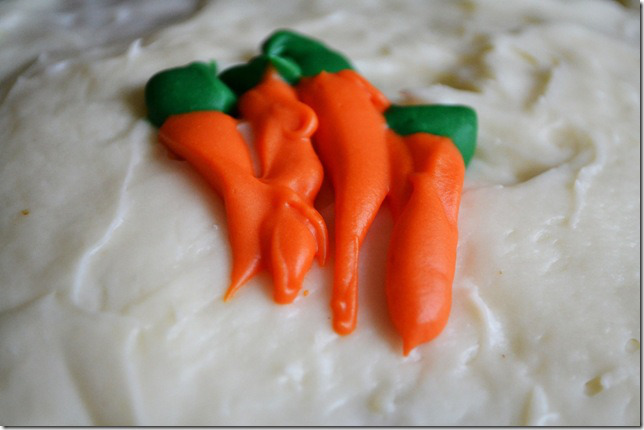
5. I used some food dye to make carrots on my cake.  I put a small amount of the icing in two separate bowls and added green to one and yellow + red to another to make orange.  I then used two Ziploc bags and cut a corner off each bag to carefully create the carrots on the cake.138For icing:
•1 pound (16 ounces) cream cheese, room temperature
•2 teaspoons pure vanilla extract
•1 cup (2 sticks) unsalted butter, cut into pieces, room temperature
•2 pounds confectioners’ sugar, sifted
1. Using a mixer, combine cream cheese and vanilla until light and creamy.  Gradually add butter until well combined.
2. Reduce speed to slow and add sugar slowly.
132
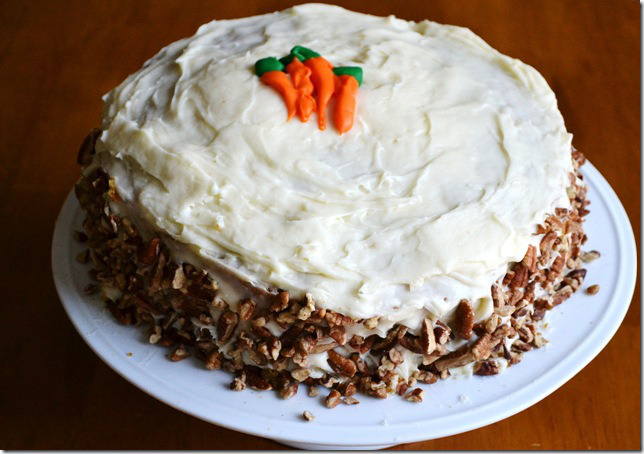
The cake turned out being perfectly moist and smooth.  Topped with the sweet, creamy icing and crunchy pecans, it was the perfect birthday cake.  I was so glad that it not only turned out, but turned out well!  So well that when others tried it they asked if  they could place an order.  My first carrot cake attempt was a success Smile

Guest Post by the Dainty Chef: Blueberry Buckle

Hello All I Eat Food readers! My name is Krissy, the Dainty Chef, my blog is where I share recipes that are family favorites and ones that I stumble upon in magazines, cookbooks, and other blogs.  Allie asked me to share something with you. I am returning the favor since Allie did a guest post on my blog a few months ago. You can check it out here. Thank you Allie for this opportunity to share with your readers.
On my blog I try to keep a balance of savory and sweet recipes, but sometimes I have a tendency to lean towards more sweet dishes. I love to bake and always have my eye on new and delicious treats. This recipe is actually a family favorite. I am not one to eat blueberries very often on their own, but I do love them when they are baked into something. This cake reminds me of summer because that is when my mom would always make it. Since my summer is right around the corner, I thought this was the perfect time to whip this up. The best part about it is that you can enjoy this cake as a dessert or in the morning with a cup of coffee. It is very versatile in that way. I hope you enjoy this as much my family does.
Blueberry Buckle
(Printable Recipe)
Ingredients:
For the Cake:
2 cups flour
2 tsp. baking powder
1/2 tsp. salt
3/4 cup butter
3/4 cup sugar
1 egg
1/2 cup milk
2 cups blueberries
For the Topping:
1/3 cup flour
1/2 cup brown sugar
1/4 cup butter
1/2 tsp. cinnamon
1/4 cup chopped walnuts (optional)
What you’ll do:
For the cake: Stir together flour, baking powder, and salt. In separate bowl, cream sugar, butter, and egg. Alternately add the dry ingredients and milk, stirring well after each addition.
Mix first four toppings ingredients until crumbled. Place 1/2 dough on the bottom of a greased and floured tube pan. Place blueberries on top and remaining dough on blueberries. Sprinkle with mixed topping. Bake for 45 minutes at 350 degrees.
Source: Betsy Blaston

Spring Mix

There’s a popular dessert recipe in my family with an inappropriate name. Sure there are other names for this dessert, but the real name is politically incorrect. Though I decided that it must be shared because everyone, and I mean everyone, loves this recipe.
For the sake of being polite, we’ll call it…
Spring Mix
You will need:
•3 cups Cheerios
•3 cups Rice Chex
•3 cups Corn Chex
•3 cups pretzel sticks
•3 cups dry roasted peanuts
•1 bag M&Ms
•3 bags white chocolate chips

1.) Combine all ingredients except M&Ms and white chocolate in a large bowl.
2.) Put white chocolate in a microwave safe bowl and microwave for 3 minutes, stirring every 30-45 seconds until melted. Continue to stir once chocolate is melted so it starts to cool.

3.) Pour melted chocolate over cereal and stir together.

4.) Then stir, stir, stir! Make sure everything is very well coated. Once coated, add the M&Ms and continue to stir.

5.) Let cool for about an hour and allow mix to harden. Then break into chunks and store in a dry airtight container.

Still wondering the real name of this delicious concoction? Well, here’s a hint. The first word is the color of egg shells and the second word is what you put out to the curb once a week. Got it ;)?
Does this politically incorrect name stop me from eating it? Not a chance. It’s sweet, salty, crunchy, and chocolatey. Just make it and give it a try, I bet you’ll be too busy munching to even care.